Add-on Repository Sturcture
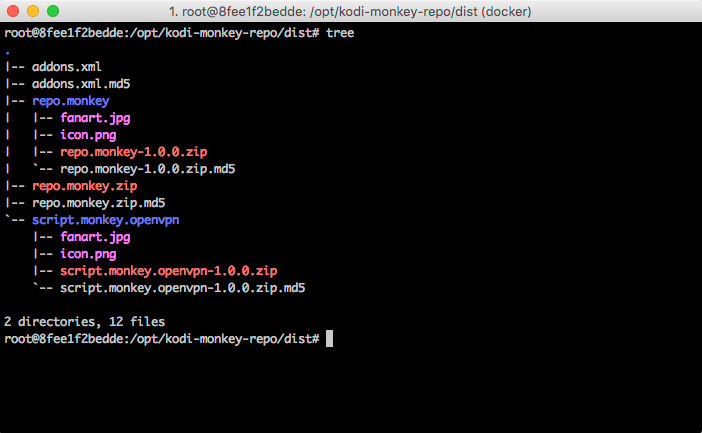
To distribute an add-on repository, a specific folder structure needs to be exposed over HTTP. At the root of the structure is addons.xml that indexes the add-ons contained in the repository. Every add-on is placed in a subfolder that matches its id and contains 4 files:
${id}-${version}.zip- The add-on code.${id}-${version}.zip.md5- MD5 file of the zipped add-on.icon.png- The add-on icon.fanart.jpg- The background image when the add-on is selected in Kodi.
A Kodi repository is also packaged and installed as an add-on.
Add-On Structure
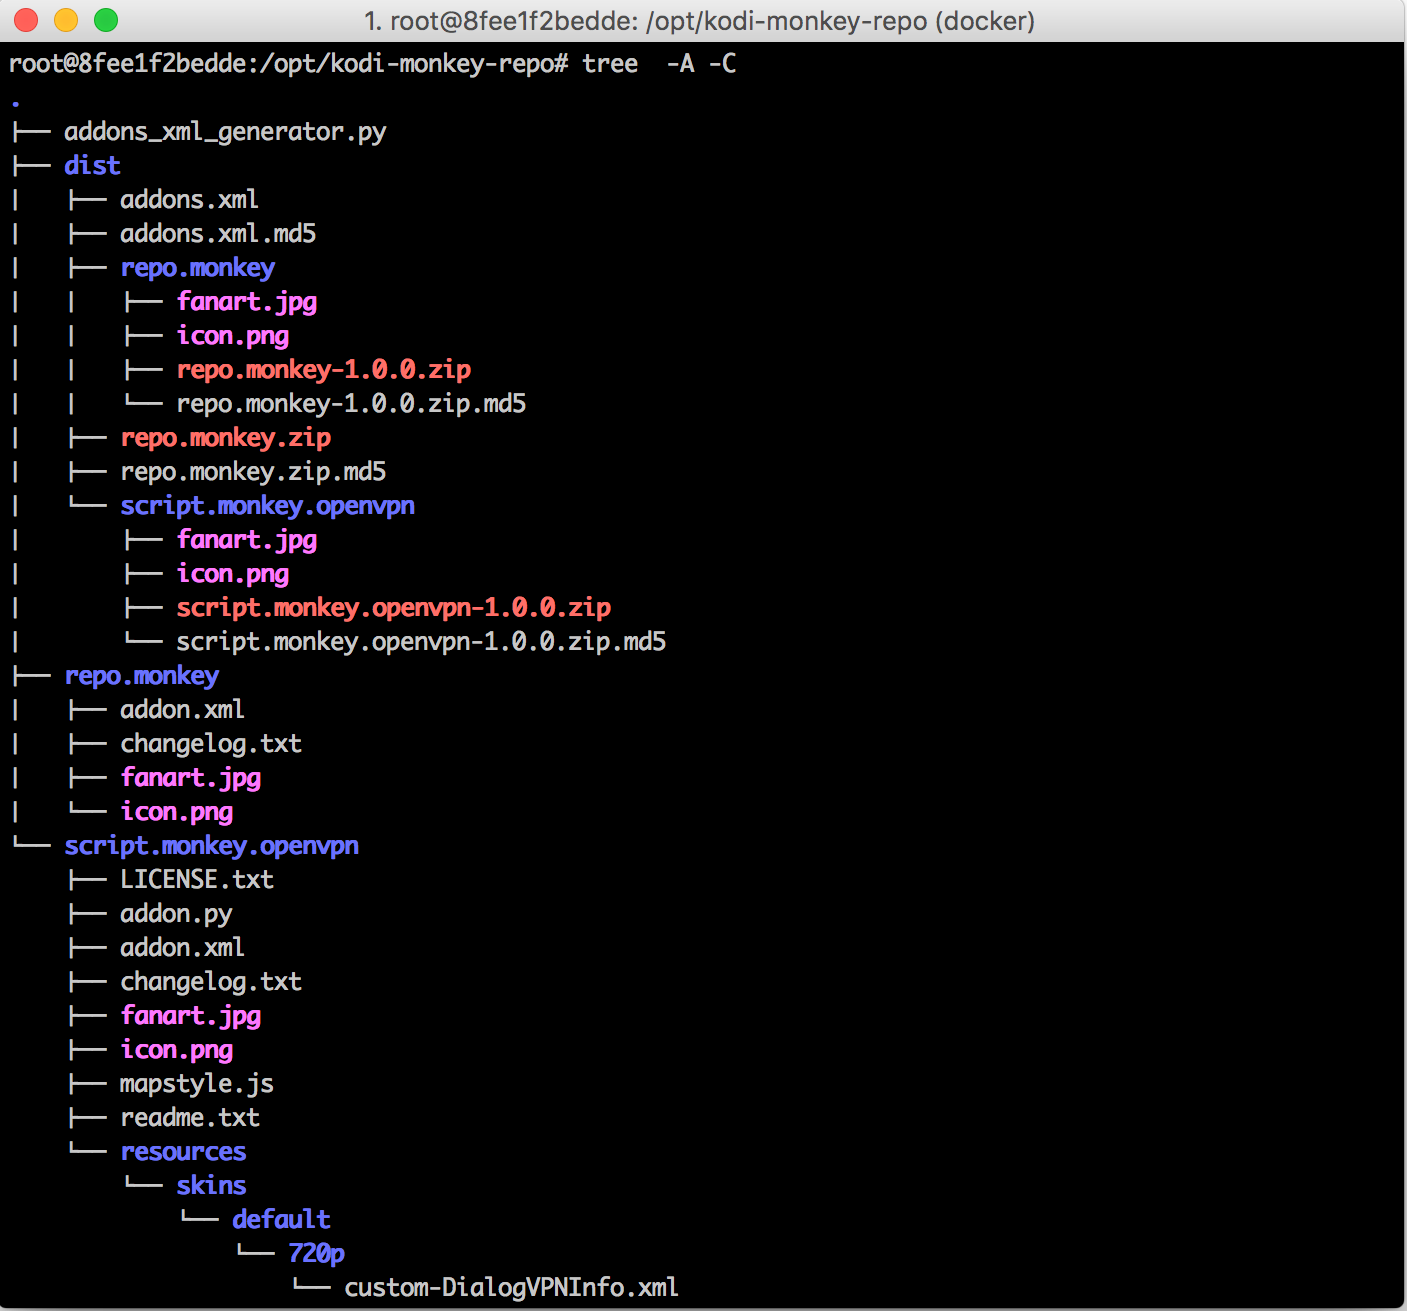
A basic script add-on consists of an addon.xml file and a python script that acts as an entry point. Custom window xml files are placed in resources/skins/default/720p/.

Building the Distribution
The kodi-monkey-repo is structured to contain the source for every add-on in a subfolder. Executing the addons_xml_generator.py python script, will produce the Kodi add-on repository structure in the dist folder. Pushing the dist folder to Github simplifies sharing the repository with the Kodi community.
Development Environment
Kodi dev is a Vagrant project that builds an Arch Linux Virtual Machine (VM) with a clean Kodi installation. This provides the perfect environment for developing an add-on.
Vagrant will automatically mount the working directory on the host to /vagrant on the VM. Placing the git repo here makes the source visible to the VM.
$  git clone https://github.com/monkey-codes/kodi-dev
$  cd kodi-dev
$  mkdir -p ./git/kodi-monkey-repo
$  vagrant plugin install vagrant-reload
$  vagrant up
Ideally you will want to make changes to the add-on and just re-run the script in Kodi, instead of re-installing the add-on repeatedly. To do this, first produce a distribution of the add-on and push it to Github. Then install the repository in Kodi from the zip file in the dist folder. The repository add-on itself will just contain an addon.xml file with URL’s pointing to the dist folder on Github.
Once the repository and the add-on is installed, you can symlink the installed source back to the git folder mounted under /vagrant on the VM.
$ vagrant ssh
$ sudo su - kodi -s /bin/bash
$ cd ~/.kodi/addons/script.monkey.openvpn/
$ rm -rf ./*
$ ln -sf /vagrant/git/kodi-monkey-repo/script.monkey.openvpn/* ./
$ exit
$ sudo systemctl restart kodi
From this point onwards, changing the source on the host machine will reflect in Kodi, when you re-run the add-on.
Add-on Basics
This section covers a few examples of how to do the most common things in a script.
I started with the Hello World Add-on example and then progressively modified it to develop the OpenVPN Add-on.
addon.xml
This file describes the add-on to Kodi, including how to execute it.
<requires>defines the add-on dependencies.xbmc.python.scriptextension point tells Kodi that this is a script add-on and which python file to execute when the add-on is invoked.
Displaying a List of Options
The easiest way to display a list of options or a menu is to use the select dialog. It takes a list of options and blocks the script until an option is selected, returning the index of the selected option.
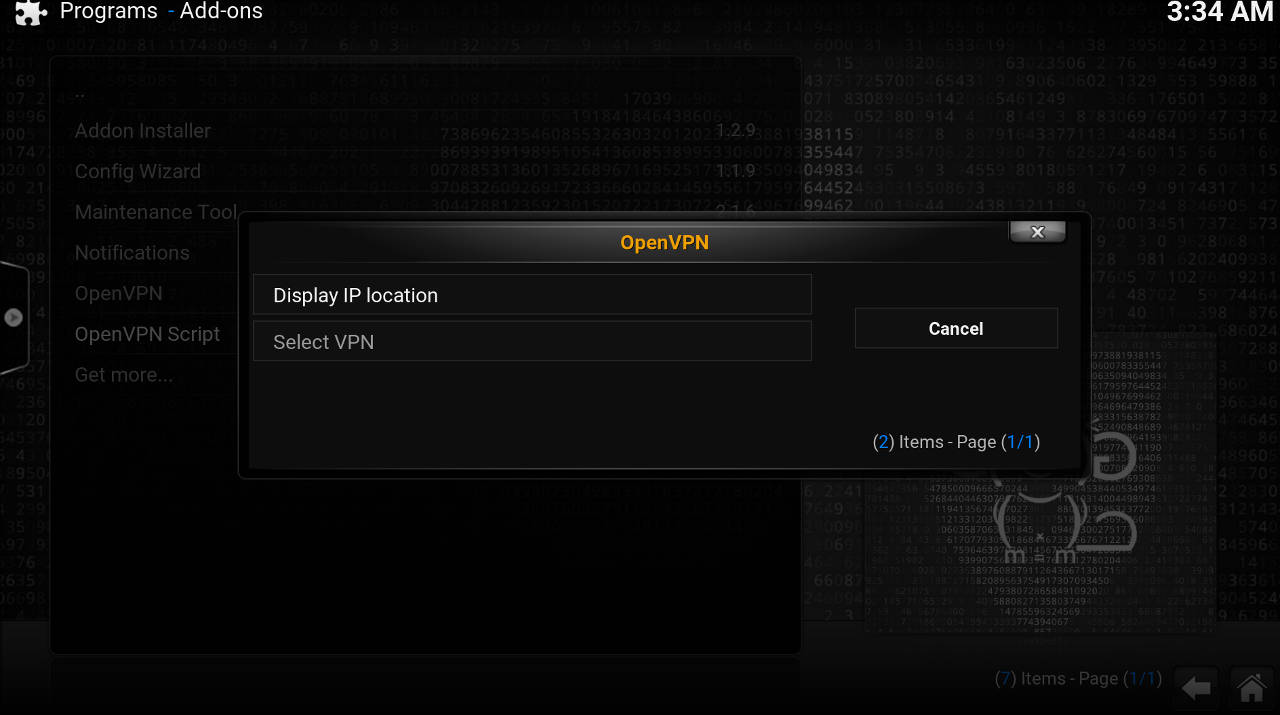
Since selecting options from a list is a common operation, I found it useful to define a generic select function that accepts a specific data structure for options. An option consists of a label, a function (func) to be executed when the option is selected, and a complete function to control flow of the script after an option has been selected.
The example above illustrates the code for the main menu in the add-on. Hopefully it clarifies the use of the complete function, in this case the script will render the main menu again once one of the selected options complete.
It is worth noting that selecting options can be nested. The cmd_select_vpn will in fact display another dialog using the same mechanism.
Displaying a Busy Dialog
Some options may take a while to execute, a good user experience will let the user know that something is happening. Kodi provides a built-in busy dialog. To display it whenever an option is selected, the func of that option is curried with the cmd_busy function.
Custom Windows using XML
When none of the basic GUI controls are sufficient, you can compose a new window using XML. These files live in resources/skins/default/720p. A good place to start is to copy one of the bundled files in the default skin under /usr/share/kodi/addons/skin.confluence/720p/.
After plenty of googling, I found a way to pass variables to the custom window. Basically lookup one of the predefined windows and set a property on it. The variable can then be read in the XML using $INFO[Window(10001).Property(PropertyName)].
Troubleshooting Installation Issues
After many infuriating attempts to re-install the add-on after having pushed changes to Github, I realized that Kodi caches the packages locally after the first download. Simply uninstalling an add-on does not remove the cached package. To ensure that Kodi downloads a the latest distribution, delete the cached packages in /var/lib/kodi/.kodi/addons/packages/.